 |
| Final product...Buckeye Delights |
Monday, December 12, 2011
Day 3 of my Christmas baking: Buckyeye delights

Sunday, December 11, 2011
Day 3 of my Christmas baking: Apricot pinwheels
Okay, so I started making the pinwheel shapes and I just thought the heck with this its just too much work just for the pinwheel shape. So I just went back to what I normally do and that is to wrap the dough like a blanket over the apricot filling. It went by much faster.It all tastes the same, right? ( I'm trying to justify my reasoning here)
 |
| Here is the final product.They still turned out just as delicious! |
Day 3 of my Christmas baking: Pecan tarts
It has been a busy weekend with finalizing my Christmas shopping and battling this darn cold that I have. But, none the less, it was a great weekend!
To finish off my plans for this weekend I am baking pecan tarts from tasteofhome.com and apricot pinwheels. I'm trying the recipe for apricot pinwheels for the first time from goodhousekeeping.com. The pecan tarts recipe is a great recipe. I have been baking these every year for at least 8 years now.
Here are the pecan tarts! I'm pleased with them. The crust is flaky, buttery and cream cheesey. Bite into one and the center is flowing with a pecan filling. Topped with a maraschino cherry half. YUMMY!
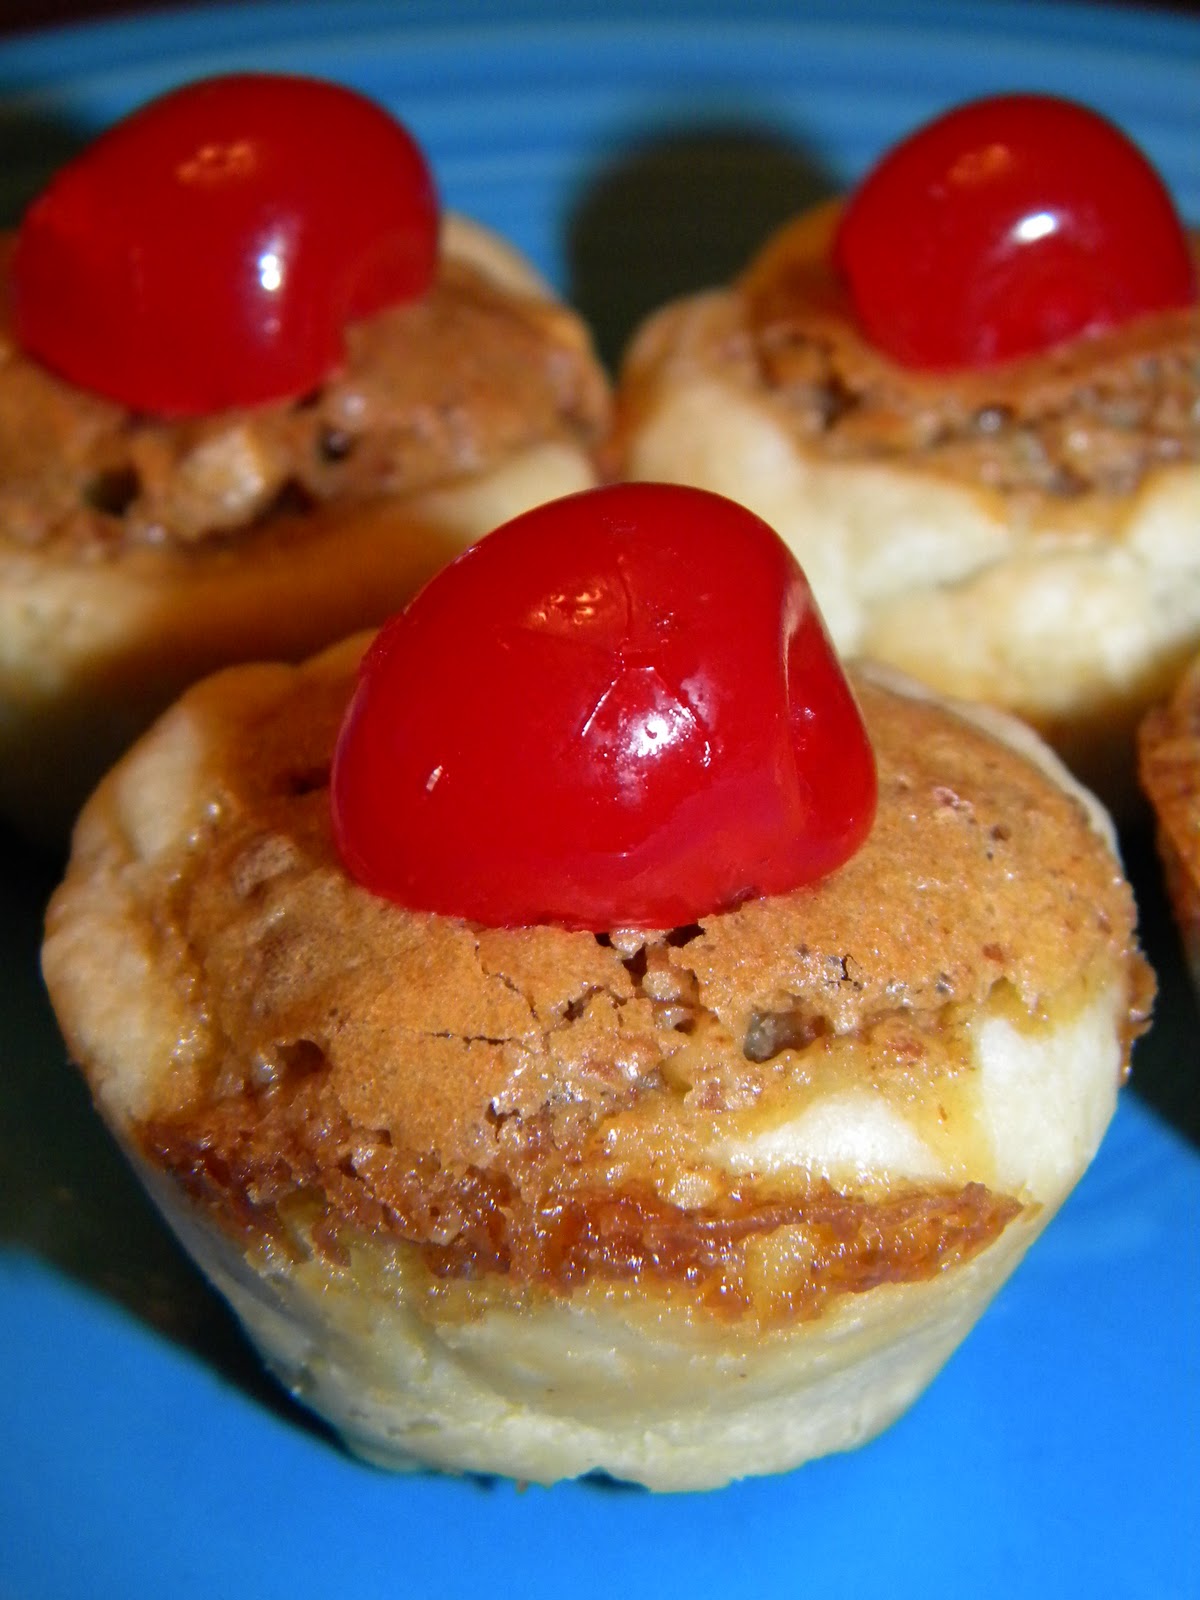 |
Here are the pecan tarts! I'm pleased with them. The crust is flaky, buttery and cream cheesey. Bite into one and the center is flowing with a pecan filling. Topped with a maraschino cherry half. YUMMY!
Thursday, December 8, 2011
Day 2 of my Christmas baking: Mrs. Bell's Cookies Part II
 |
| The final product: Mrs. Bell's cookies |
Oh my goodness are these cookies are a lot of work to make! But, they are very much worth it. I've already ate oh, maybe 6-8 of these.
I asked my neighbor Fran today ( the lady that gave me the recipe ) who is Mrs. Bell? Fran told me that her sister used to be a hair dresser and Mrs. Bell was an older lady that used to get her hair done at where Fran's sister used to work. Fran's sister and Mrs. Bell used to swap recipes and that is how Fran acquired the recipe. Mrs. Bell has since passed away.
I also asked Fran how long has she had the recipe( remember Fran is 94 years old) and she said to me, "Oh, many years now." So, who knows where Mrs.Bell got this recipe from, if she created it herself, or if was passed down from her family or someone else. I will definitely keep this recipe and only make it at Christmas time and pass the recipe down to my kids because it is such a special little cookie with a story.....
Day 2 of my Christmas baking: Mrs. Bell's Cookies
Across the street from my house is the sweetest lady you'd ever meet. Her name is Fran and she is 94 years old! You would never in a million years guess her to be that age. She still drives, she keeps the cleanest house I have ever seen, and she and her 80 something year old sister go everywhere together. She has been a mother and homemaker her entire life. She has never worked a day outside of her home. I admire and respect that about her. In my opinion, motherhood is the most important job on this planet. What would this world be like without mothers like her.
Anyway, she is a wonderful cook. The more I get to know her (and sample some of her delicious baked goods) the more I realize that I can learn a lot from her. Last Christmas she made these out of this world little pastry cookies that I have never seen of or tasted before. I couldn't get enough of them! To describe them I would say that they are little flaky bites, with a date and nut filling, with a sprinkle of powdered sugar on top. I could of seriously ate a dozen of them at one sitting!
I asked Fran for the recipe and she so graciously gave it to me. As far as how old is this recipe, I'm going to have to ask her. And where did it come from, I don't know, I will ask her that too. So, today I am excited about attempting to make these for the first time.
This is exactly how Fran wrote down the recipe for me:
Mrs. Bell's Cookies
1 lb. oleo
5 cups flour
5 tablespoons sugar
Mix like dough for pie
Add:
1 teaspoon vanilla
4 egg yolks
8 tablespoons sour cream
Make filling:
1 lb. dates chopped
2 cups sugar
1/2 cup nuts
1 1/2 cups milk
Cook 4 mins. and cool
Bake at 350 degrees - 20 minutes
Roll into powdered sugar
In a few hours I will be posting, what I hope to be, pictures of just as delicious of a cookie that Fran made.
Tuesday, December 6, 2011
Christmas in downtown Jefferson, Ohio

Jefferson, Ohio...it is a quaint, cozy little town. My family and I have lived here since 1989!
Located in Ashtabula County, the largest county in Ohio.


 Jefferson Diner... this is another business in town that when you walk in, it feels like you're in a different era. My husband and I go here for what we call the gravy boat. On the menu it is the open faced sliced turkey with mashed potatoes and gravy. But, the way we order it is with french fries instead of mashed potatoes and gravy over the whole thing! I know, it's so bad for you. But, oh sooo goood.


Day 1 of my Christmas baking: Peppermint Snowballs
  | ||
1/2 cup crushed peppermint candies
1/4 cup powdered sugar
1 cup butter softened
1/3 cup powdered sugar
1 teaspoon of vanilla
2 1/4 cup Gold Medal flour
1/4 teaspoon salt
Heat oven to 325 degrees.
Mix 1/4 cup of crushed candy and 1/4 cup of powdered sugar. This will be used to roll the cookies into when they come out of the oven.
Beat butter, 1/3 cup of powdered sugar, vanilla and the rest of the crushed peppermint candies. (1/4 cup)
Then mix in the flour and the salt.
Roll teaspoonfuls into 1 inch balls, place about 1 inch apart on cookie sheet and then bake for about 12-14 minutes.
When done baking, roll into powdered sugar mixture and let cool on rack. Wait about 10 minutes and reroll cookies in sugar mixture.
 |
| Ready to roll the baked cookies into the powdered sugar and peppermint candy mixture. If you like peppermint it's a sure guarantee that you will like these. I am done baking for today! It is beginning to feel a lot like Christmas! |
Day 1 of my Christmas baking: Thumbprint Cookies with cherry filling center
 |
| Finished product: Thumbprint Cookies |
 |
| All of my assembled ingredients |
 |
| Mixing the butter, shortening, brown sugar, egg yolk and vanilla |
 |
| My little assembly line... |
 |
| My favorite part of making thumbprints: the thumbprint |
 |
| Now into the oven for about 10 minutes |
Monday, December 5, 2011
Only 19 more days until Christmas!
Today, in our lovely little quaint village of Jefferson, Ohio, it was raining when I woke up this morning and it's still raining 14 hours later. Oh, how I wished that it would turn to snow. Let it snow, let it snow, let it snow!
The topic today amongst all of the villagers that I came across was the weather and Christmas! So, of course I reminded people that we only have 19 more days left until Christmas eve! I think I reminded that gem so many times today that the pressure of my countdown started to get to me. But, then I took a deep breath and thought to myself that I have 19 more days to bake, bake, bake my behind off. Plenty of time! So, with that said, I will posting the start of my Christmas baking adventure in the next few days.
The topic today amongst all of the villagers that I came across was the weather and Christmas! So, of course I reminded people that we only have 19 more days left until Christmas eve! I think I reminded that gem so many times today that the pressure of my countdown started to get to me. But, then I took a deep breath and thought to myself that I have 19 more days to bake, bake, bake my behind off. Plenty of time! So, with that said, I will posting the start of my Christmas baking adventure in the next few days.
Sunday, December 4, 2011
Chocolate, chocolate buttercream cupcake topped with a Malley's chocolate coffee bean and my first attempt at a faux bois chocolate disc.

Subscribe to:
Posts (Atom)